Sony Ericsson K600i Disassembly & Screen Replacement
These instructions are provided as information only; I am not a Sony Ericsson technician. Disassembly of your phone is at your own risk!
I love my Sony Ericsson K600i. With sleek, understated styling and fantastic features such as Bluetooth, 1.3 Megapixel digital camera, MP3 playback, built-in AM/FM radio and an easy-to-use menu system, it's a winner. It also features the legacy Sony Ericsson power and accessory terminal. That means I can use my K600i with the numerous, affordable chargers and other accessories that have been Ericsson compatible since the 1990s.
So when I cracked my phone's screen by carelessly smashing it under my laptop in my bag, I was determined to get my phone back into action quickly. I ordered a replacement screen from eBay from a Hong Kong vendor ($25) and it arrived to my home in Los Angeles about 10 days later. Below is a step-by-step procedure of how I replaced my cracked screen.
Tools You Will Need:
- T6 Torx Screwdriver
- Tweezers (optional)
- Small Standard Screwdriver (optional)
Step 1: Remove Back
Flip the tabs to the unlock position (in the direction of the arrows) to release the back cover. Gently pry the cover off to reveal the battery compartment.

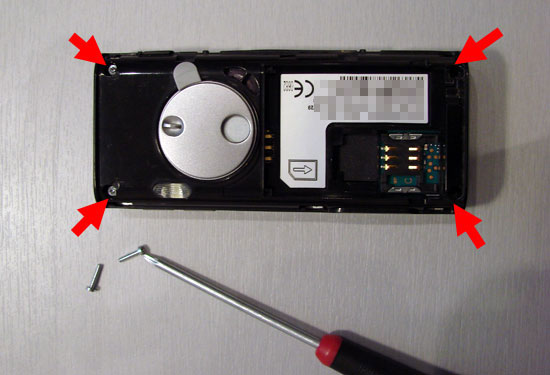
Step 2: Remove Screws
Use the T6 Torx screwdriver to remove the four screws indicated by the arrows.
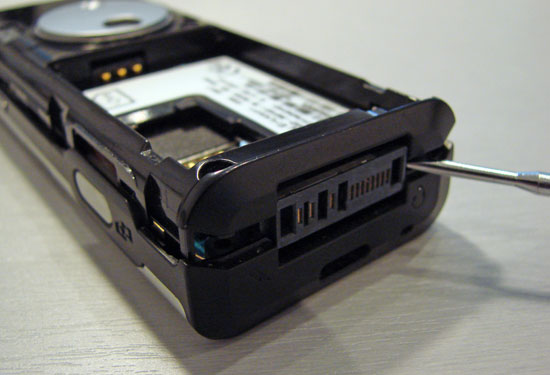
Step 3: Pry Housing Apart
Using your fingers, pry the two halves of the phone housing apart. This requires a little persistence and manual dexterity. I found it helpful to start at the bottom near the power/accessory connector and then work my way up prying the rest of the phone apart. If needed, you can gently separate the two halves using the small standard screwdriver.

Remove the back half of the camera's housing and set it aside.
Step 4: Remove Phone Guts
Now you'll need to extract the innards of the phone (circuit boards, etc.) and remove the front phone housing. This is easier than it seems since there are no additional screws or tabs that need to be pried. Just gently pull the innards away from the front housing. If you find this difficult it may be helpful to remove the innards at an angle (it's probably the buttons that are stuck and preventing the housing from being removed easily).
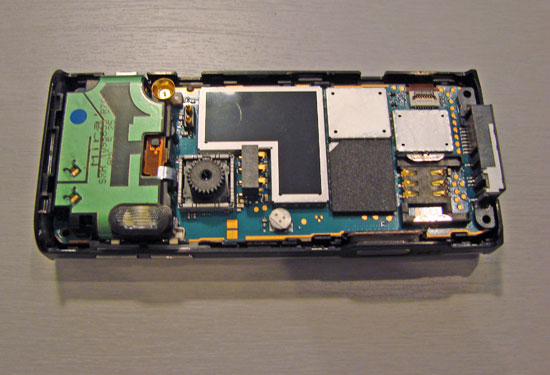
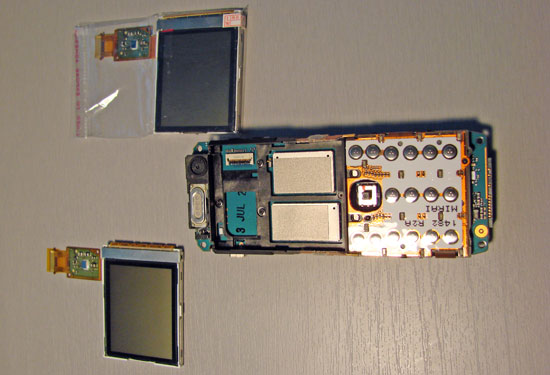
Once you remove the housing, the phone will look like the photo below.
There's no need to remove the keypad buttons for screen removal, but I did anyhow to clean the dust and gunk that had accumulated around the buttons. The keypad is removed by gently prying the keypad from the directional button (pry from underneath the rubber keypad).
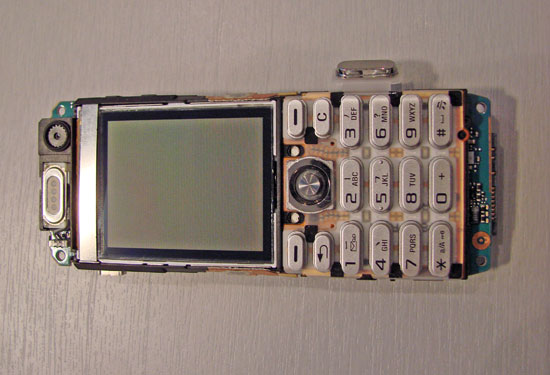
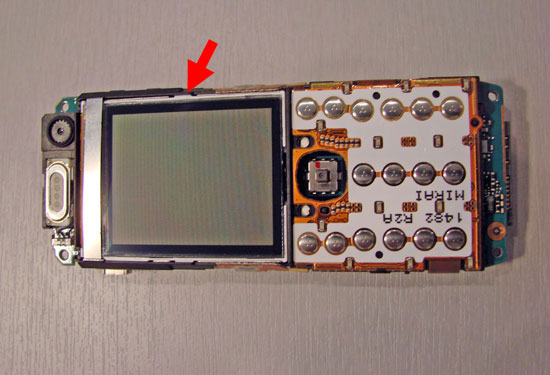
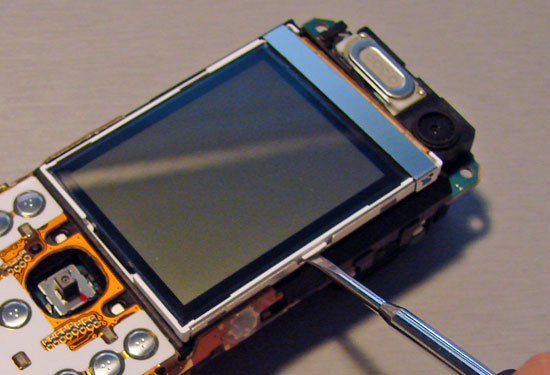
Step 5: Remove Screen
Gently pry the screen away from the phone's innards with your fingers or small standard screwdriver as shown in the images below.
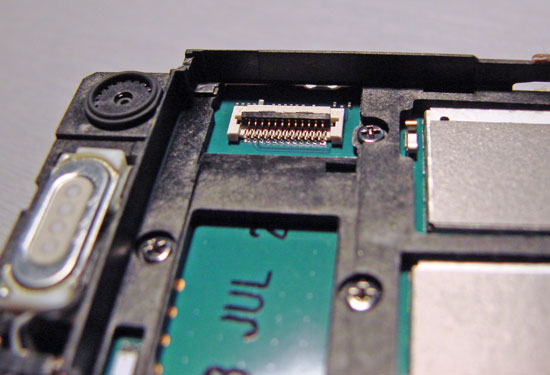
Once you have lifted up the screen, you'll see the LCD display connector. Mine was covered with a small piece of yellow tape. Remove the tape using your fingers or tweezers so you have access to the display connector and set the tape aside for use during reassembly.
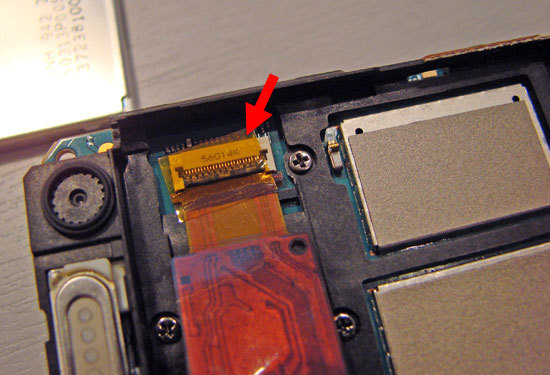
Locate the small black tab. This tab locks the screen cable in place. DO NOT SIMPLY PULL OUT THE CABLE, you could end up damaging your phone. Instead, gently pry the small black tab up using your small screwdriver or tweezers. Once the tab is flipped up your screen's flat cable should slip out of the connector easily.

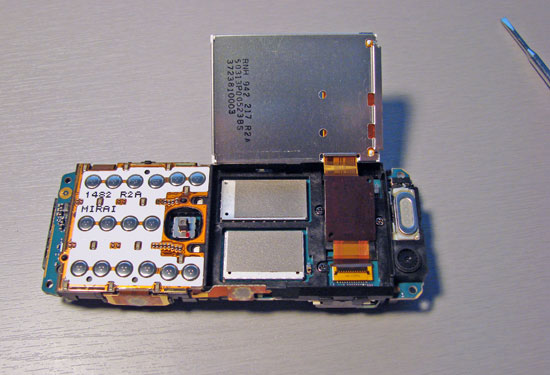
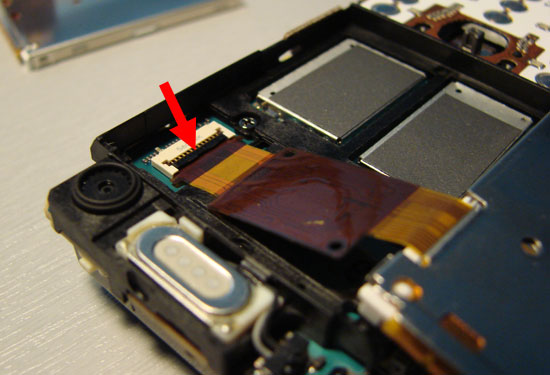
This is what your phone will look like when you have removed the screen.
Step 6: Install New Screen
Carefully slip the flat cable from your new screen into the phone's display connector until the small flanges on the flat cable are butted up against the white part of the phone's display connector. Once this is done use your tweezers or small screwdriver to flip the black tab on the connector down, locking your cable into place. Once this is done reapply the small piece of tape you set aside in step 5.
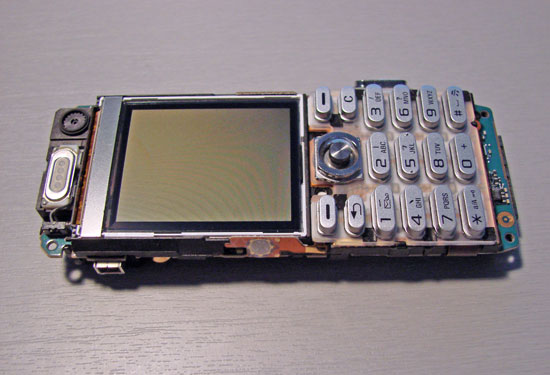
Fit the screen back into the phone's innards so it looks like the photo below.
Step 7: Reassemble the Phone
Reassembly is simply a matter of reversing the steps for disassembly. Here's a couple of helpful hints when putting your phone back together:
- Pay special attention to properly aligning the rubber keypad buttons and the front of the phone housing
- Make sure all the little rubber buttons and port covers are in place before snapping the two halves of the phone together, or you'll have to take it apart again to put them back into place
- When reinstalling the screws, do it diagonally...that is, screw in one corner, then the opposite corner, and so on
- Don't over tighten the screws or you could crack your phone's plastic housing or strip out the screw threads.
I hope you've found these instructions helpful. Good luck!